springboot整合Mail服务

integrate mail service into springboot

导入mail包

1
2
3
4
    <dependency>
        <groupId>org.springframework.boot</groupId>
        <artifactId>spring-boot-starter-mail</artifactId>
    </dependency>

application.yml配置

 1
 2
 3
 4
 5
 6
 7
 8
 9
10
11
12
13
14
    spring:
        mail:
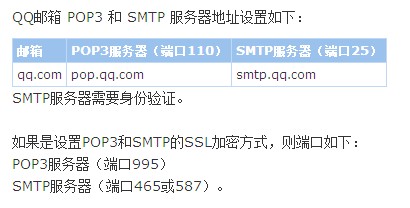
            protocol: smtp #smtp是邮件发送协议,pop3和imap是邮件接收协议。因为我们要发送邮件,因此是smtp
            host: smtp.qq.com #邮件发送服务器的主机,这里采用qq邮箱服务器
            port: 587 #这个端口是必须设置的,看到好多教程,都没有设置它
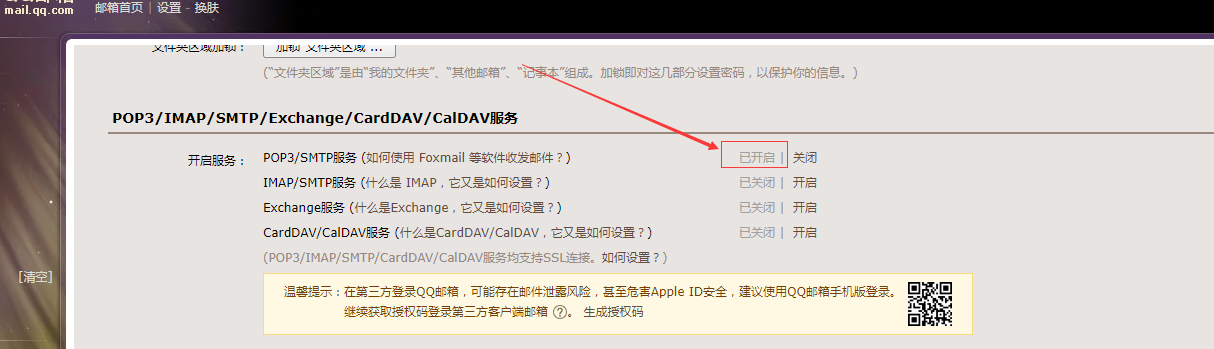
            username: #qq邮箱,
            password: #qq授权码
            properties:
                mail:
                    smtp:
                        auth: true
                        starttls:
                            enable: true
                            required: true

端口配置信息,仅供参考 2017042614212226.jpg

Tests

 1
 2
 3
 4
 5
 6
 7
 8
 9
10
11
12
13
14
15
16
17
18
19
20
21
22
23
24
25
26
27
28
29
30
import org.junit.Test;
import org.junit.runner.RunWith;
import org.springframework.beans.factory.annotation.Value;
import org.springframework.boot.test.context.SpringBootTest;
import org.springframework.mail.SimpleMailMessage;
import org.springframework.mail.javamail.JavaMailSender;
import org.springframework.test.context.junit4.SpringRunner;

import javax.annotation.Resource;

@RunWith(SpringRunner.class)
@SpringBootTest
public class BlogApplicationTests {
    @Resource
    private JavaMailSender javaMailSender;

    @Value("${spring.mail.username}")
    private String sender;

	@Test
	public void contextLoads() {
        SimpleMailMessage message = new SimpleMailMessage();
        message.setFrom(sender);//发送者.
        message.setTo("[email protected]");//接收者.
        message.setSubject("测试邮件(邮件主题)");//邮件主题.
        message.setText("这是邮件内容");//邮件内容.
        javaMailSender.send(message);//发送邮件
	}

}

关于QQ授权码

1.png 2.png

Licensed under CC BY-NC-SA 4.0
Last updated on Apr 27, 2020 22:06 UTC